# 12 Swell Coverings and Cantle Backs
- olliephinizy
- Oct 21, 2019
- 11 min read
Updated: Feb 21, 2020
We are preparing to attach the cantle backs next week so we cut the shape out from a pattern but add a little to make sure we have enough leather, for us about 1 1/2 inches. If you did not have a cheyenne roll you would not add the extra. Take a measurement from the base of the cantle back where the bars meet the cantle. Then we need to make a tab that folds under the seat. Divide that measurement in half and set it to the wing divider. Mark the center on the pattern and draw a half circle so that it faces outward from the pattern onto the leather, for this we used the light leather. Use a hole punch about 1/4 inch at the intersection of the half circle and cantle back about 1/2 inch up. There will be this 1/2 inch edge folded forward onto the bars once installed on the back of the cantle. Cut the leather piece out on the etched line. Skive well the cheyenne under piece area and the 1/2 inch where it will fold onto the bars. Do not skive across the edge, skive from center outward.


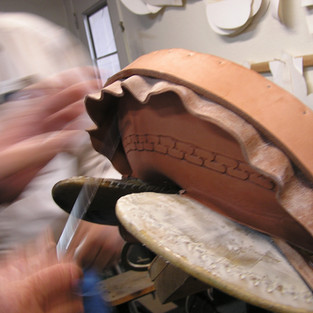
We center and place the piece behind the cantle so enough of the leather will fold backwards under the cheyenne roll. Wet the piece pretty well so it is quite flexible. We then press it into place keeping it centered. Then take a bone folder and reach up under the cheyenne roll and push the piece into place, forming creases top and bottom. Once the leather is creased well and sharp down into the crevices and under the tails of the cheyenne roll remove it.


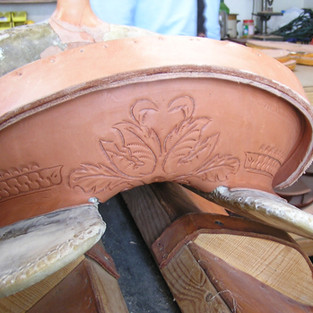
We then take the leather home for tooling. Paul chose to just run his pattern horizontally curving slightly to mirror the top curve of the cantle somewhat. I chose to do a leaf pattern in the center coming up out of the bottom. This is the same as the one on the fenders. Then taking the border pattern I was using to the left and right.
Then back at Randy's it goes on as before keeping everything centered, this time with a coating of Elmers glue on each piece while keeping fingers and other leathers clean. The center tab gets folded up and stapled into place.


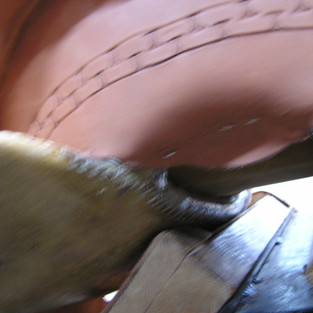


Then a sharp knife held perpendicular to the cantle backs leather plug and trimmed smooth with the edge being careful NOT to cut the new cantle back. Getting around and under the points very carefully. The center picture above shows the 1/2 inch folded back down onto the bars as described above.

Coming up to doing the swells is a bit ominous due to the fact that our saddle trees are cut back quite a lot at the leg. A single piece of leather probably could not be stretched to that extent. It may even also cause a split later in life if the leather is stretched to thin. To cover our Will James forks we will have to put a split down each side of the swell and rejoin the leather somehow. There are a few options to get this accomplished. Paul chose the laced rawhide look and I went with a welt. We each wanted to be taught more than one approach. So we chose different from each other. You can take your splits or seams down from the rounded point of the tree shoulder down the side to right above where the concho will go or you can take it forward away from the seat. You can decide how to go by looking at lots of samples of saddle photos. You will probably do as we have and continue to look at inspiration photos through the whole build process.
I had decided on the welt and I knew it might take me a few tries. So I wanted to practice. So I made some attempts at home. The first try I did not try hard enough. I stitched it by hand, I was sewing through four layers of leather and I just did not get it tight enough. My first problem was I did not use my stitching pony, which I have, and thought to myself this was just a try. To me it was more about getting the shape correct. I had taken a copy of a pattern Randy had that he had made of a swell from a Will James. He explained you really can not use a pattern because each tree is a little different. The measurements you order can throw it off a bit, just enough to not fit a previous pattern fit. So don't try it. But this was my practice and I did use it for that. I cut out a butterfly type shape from some scrap of not great leather and made a welt. The welt was long and narrow and was going to be folded and sewn between the wings of the butterfly creating the four layers. But when try number one was done and turned to the correct side you could see the stitches, big fail. The second try was pretty good, this time done tight by sewing on Randy's machine, only having a hole at the top that was a little to large, (see comment below). Both of my samples were only a half of the swell area. With my second attempt I felt I could go ahead and make the swell cover and hope to not waste good leather.
We are very happy we invested in Al and Ann Stohlman's hard cover three volume book on saddle making. We love to look through it for fun and also to look things up. I especially love it because the art reminds me of my father. He was every bit as good as Al. Whenever he wanted something understood he would do an amazing drawing right before you eyes. He never did anything with it though, but he was amazing.
I opened the book and looked up welts. Al shows two types, one folded and one not. I have seen both in person and both are fine. I went with the folded leather welt because I thought it might be easier to keep clean. You can use any medium leather, veg tan, chrome, dyed or not dyed, latigo, there are many design options allowed here if you like. I just went with the same as I was using on the saddle. You make the welt about 14 inches long, (measure to fit your swell). Cut it about 1 1/4 inches wide. Wet pretty well. Skive one end pulling outward from the center about 1 1/4 inches back. This end once folded will have its center shaped and pushed out from the inside to form sort of a knuckle. This knuckle will go up tight into the hole you punched in the swell shoulder, (explained next), to fill that hole up. Fold the strip in half lengthwise, coat with contact cement, (except for the knuckle area), and hammer gently a tight fold with a rubber hammer. Push a modeling tool into the knuckle center working it outward to make a bump whilst pulling it down to basically make a 45 degree turn. There will be a flat tab pressed out on the end. That will go up behind the hole you punched in the cover.


Next, cut a piece of heavy leather large enough to cover the swells. Ours were near 18 x 22. Take measurements with a cloth tape of the swells going both directions. Cut out that rectangle with a little to spare. Measure the width of the horn base, just enough to cover the wrappings there but small enough to look neat. Compare that width with the horn width. The wet leather will stretch over the horn quite a bit so it will be OK if the measurement for the hole seems a little small.


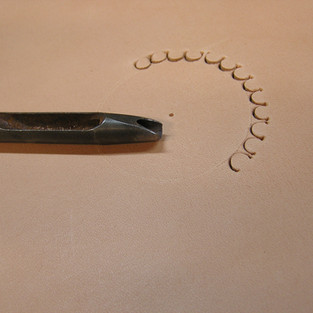
Next take measurements on the tree to find the center of the horn. Transfer this measurement to the piece of leather. Mark on the top of the leather the center of the horn location by taking measurements to find where the hole would set. Next take a wing divider and set it to half of your hole size. Lightly etch the circle in the leather. Next take a 3/16 inch half punch and punch around the circle by placing the punches point tips on the line with the curved edge pointing toward the center of the whole, very important. This will leave a nice scalloped edge on the swell cover. Now wet this quite well and let it set and wet again. you are looking for soft and stretchy.
On the tree find the top center of the shoulder and make a mark, we used permanent marker. Then as straight as you can draw a line down to the concho location. This is the mark where you will cut your leather to fit it to the swell.


Now you will be putting this on the saddle tree swell itself for fitting. You will most likely have to stretch it over the horn. After a few on and offs it works more smoothly. Drape it over the swells so the hole is centered on the horn base. Smooth it out everywhere pushing the excess toward the ends. Just working with one side smooth and feel for the shoulder and place a etched mark there. Using 1/8 inch round punch, punch a hole. You can lift the leather and put a block of wood under it to protect the tree. Re situate the leather on the tree. From that punched hole take a sharp knife and cut straight out from there. Put leather back in place again and smooth one half of the leather toward that line you drew on the tree. Pay attention as to how your leather is laying. It needs to be as flat to the tree as possible along that line. Next take a sharp leather cutting knife and starting at the hole punch bottom center trim that one side of leather to match the line on the tree. Go careful and slow because you can not put the leather back. Also, it is very important to cut perpendicular to the leather, always cut it perpendicular. Next smooth the other side as before and again cut from that same bottom center point of the hole removing the excess on the other side up to the line on the tree. You do not want to remove any leather from the hole edge at all. It is important that you only cut to that one same bottom center point. Doing so would enlarge it and we do not want that. Next pinch your leather sides together. The goal is that they meet that line exactly and not go over it. If you need to do some trimming go ahead and do so.


Before you remove the leather from the tree hold leather in place on the front of the tree and take a pencil and draw under the leather tracing the edge of the gullet from bar to bar. Mark the swell leather on the seat side where the side you are working on at the place the bar meets the swell. Remove the leather and fold it exactly in half so that you can cut out the other side. Fold it down pretty tight so it is even. Do a light etch of the shape. Open it back up and do some cloth tape measurements to see if they seem pretty close to even with each other. Leather is a little forgiving in that it will stretch so real close is fine. Once satisfied cut the other side to match. By now I think you can see how important perpendicular edges are. Bevels would just not work out well. So now you have to cut or punch out the gullet area. There is more than one way to do this but we used Randy's 1/2 punches in two sizes on the pencil line. Starting in the center facing the curve away from the line into the part that will be removed. Next to that went the smaller 1/2 punch going the other way. Repeating the large and small punches in the same manner moving outward. Then we ran the smaller punch side by side across between the slits for the seat side swell leather. Position curve of punch facing the part to be removed from the seat side.


Now you can put it back on and test for fit. Perfect right? Well lets hope so and by now you have seen the butterfly I talked about above.


Now you get to take it back off and put the welt in the seam. Skive the very edges of the swell cover seams to about half what it was. Do not skive lengthwise it will change the shape of it very quickly. Go from center outward. Fold the leather where the seam will go so the right side is on the inside. Then push the knuckle very tightly up into the hole area you punched with the right side facing into the seam and line up all of the raw edges. You really need a tight grip here. Place the 4 layers up under the presser foot of the leather sewing machine. Drop the presser foot with a seam allowance of about 3/8 of an inch and start two stitches and back stitch two, move forward keeping all the layers exactly perpendicular. Do not let the underside slide away. Go slow and do not have your stitches too long. Longer stitches do not follow curves well. Short stitches shred leather and can weaken the leather and it may rip it apart. Randy uses heavy 346 nylon. Stitch to the bottom of the seam and repeat on the other side. Trim the seams very short, 1/4 inch or less with your curved razor knife. Do not cut into any threads. Wet the whole thing pretty well and turn inside out. Then gently hammer with a dead blow or rubber hammer the seam encouraging the part at the top of the welt to stay open and flared out behind the hole so it will lay flat and not have a knot there. Turn the project piece over on occasion to see that the welt is coming out in a nice straight line. You can encourage straightness as the leather will stretch a bit. Beautiful right! If you have gotten this far and are happy with the results you have done an extremely great job. This is one of the hardest parts of the saddle. But let me tell you, I did waste leather on this step, and had to start completely over. The stitching got to close to the edge on the bottom side and pulled out. It slipped away on the underside while I was sewing, so beware and go slow. But the second one worked out very well.


Then soak the piece for quite some time so that it becomes very flexible, maybe 30 - 45 minutes. Take it and stretch it back over the horn. Do one side then the other a bit at a time. It will go if your leather is wet enough. Then lift one side back up and get some Elmer's on both sides. Pull down and manipulate until in place, do the same with the other side. Keep smoothing and manipulating until centered everywhere and even and in the right place with the horn hole still centered. Huge accomplishment! If there is any spare leather where the seams are you then work it in and staple at the base. The leather will condense again if manipulated and pressed the direction you want it to go while still wet. You do not want any puckers. Trim beneath the staples and skive to a feather edge.

Paul's was done very similarly, but when he took the leather off of the tree he punched evenly spaced small holes all around the the edges of where I put the seem. He then used rawhide lace to sew it closed while on the swells. Crossing on the back and going across straight on the front. Glued first and then working as fast as he could before the rawhide dried. He ran the rawhide through a can of sheep fat to lubricate it. The lace had previously been beveled on each side so it would lay flat. While stitching he manipulated and pushed the leather so the laces would stay horizontal on the outside. It is a more rustic look but the rawhide is not going to wear through from things like ropes rubbing on it.

When the welts are completely in place remove the saddle to the table with some blankets of sheep skin to protect it. Use small brass tacks to nail the front and back scalloped edges into the gullet. Being careful not to get any stretched here or there.


Comments