#5 From the Ground Seat Up
- Paul Phinizy

- Apr 14, 2019
- 5 min read
Updated: Apr 28, 2022
We had again taken our trip along with the saddle trees back down to the ranch and Randy. We found a new addition there at the bunk house where the saddle shop is near the tack room area, Liberty is her name. She is about two weeks and cute as you please. Her momma ran off, she wasn't sure what to do with her. So, Randy brought her home and is bottle feeding her. She will get to stay on a while.


We showed Randy our hard work and it was a stretch to get it done in the time allowed, at least we thought, before this next meeting. We both felt we had more to do filling and sanding but thought we would let Randy tell us. He said we had plenty of filler on there and too much in some place so we took them outside and sanded a while just to get it smooth. He let us know one coat would have been good. But we were pleased with our result and ready to move on to the next step.


So now Randy points out this wall he has attached to the end of the table, really just a board with some clamps holding it there. It was for us to place our trees next to and measure over with a small square toward the center of all the center areas that we will be needing to keep centered. We did the same measure for each tree part, marks down each side and then split that difference to find center. We did all the parts that had a center location top and bottom.


We each got out our medium weight leathers and cut a rectangle from the edge of the belly area. It was to cover the inside of the gullet. The leather has some stretch in that area. We measured some approximate measurements to get the length and width, about 18" x 9". Did our cutting and then started skiving.
Skiving is using a razor blade held by some tool to scrape thin layers of leather off making the leather thinner. First, we wet our pieces and then we drew ovals in the center of these rectangles we had cut and skived from there out trying to make the edge of the feather thin. So kind of in a sunburst pattern all around. We each showed Randy many times and he kept saying "more", "down to a feather edge." So let me tell ya it needs to be down to a feather edge all around the outside edge. This process also kind of starts to get a curl going around the edge as the leather is wet and being stretched. This will actually be helpful because it will go on the inside of the gullet and curl back up around the front and back of the fork area.
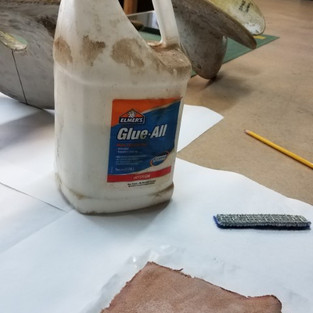
We placed the piece in place and then trimmed it against the bar area leaving that width to go past the bars about an inch. Flipped the leather piece over and gave the still wet leather a nice coat of Elmer's! Centered it and smoothed and stretched it around the forks. Then out with the staple gun, a bit of a heavy staple and not fired in real hard. Low pressure because they are coming back out. Don't want to have to dig for them. So, this is looking really good already, a nice piece of smooth leather in the gullet has been installed.


Then we move on to each of us cutting from really stiff heavy leather strap, one and a 1/2 inches wide and about 28 inches long. This is going to be for the stuffing in the Cheyenne Roll. That is the fold of leather that hangs off of the back of the cantle. There will be other pieces to go over it later on. We cut radiuses on each end for a nice taper down to the end of the cantle where it will meet the skirting later to come. For this we get out the brad nailer. Using 5/8 inch brads we nail it to the top of the cantle keeping the front side of the leather and seat inside edge perfectly even with each other. Being very careful to keep track of the angle to as not shoot the nails out the front of the seat. Another piece on, what accomplishment!


Next, we move on to building the top of the bars up with plugs. Two will be permanent and one, the stirrup leather guide, will be temporary. So next we cut from pieces of poster board patterns to keep for ourselves a shape of stirrup leather guides or plugs. A plug is a piece of leather where its job is to just be a filler. The ones for the temporary stirrup guides are a couple of oddly shaped things a left and a right. Then we cut leather to match the patterns. Those get stapled on the bars. The inside runs right along the edge where the edge of the stirrup leather slot in the tee sits on the bars by the row of nails. Then it gets folded around to the top and held at an angle and then stapled down. Same on the other side. Now there is a choice here as well with the angle and placement of these temporary stirrup guide plugs. You can angle this piece downward so the back edge of it is straighter or you can push it back a little too.
This all depends on how you like to ride or sit in the saddle. Do you sit up real straight and post in a show? Maybe a barrel racer? Are you a reiner? A cowboy? Or a trail rider? Now all of these can have room to be other seat positions too but extremes could make you not sit the way you like. So we put ours forward a bit not right under us and angled forward a bit too. Now you will understand a lot about why a saddle has these certain style names when you are saddle shopping. It depends on how you sit in the saddle and use it. So if you are not a barrel racer do not by a barrel saddle. This is important. The stirrup guide is shown in the top center picture below. You can see the back side of it toward the seat is straight and at about 45 degrees to the bars. The front fork side gets wider and allows for swing.
Next, we cut, also from real heavy stiff leather, the pieces in front of and in back of the stirrup plugs we just put in. These become guides for the stirrup leathers to help keep them in place. Those were glued down with contact cement and then the excess trimmed off. We also shaped the back end towards the seat and skived it down to fit nice.
Let me say here, there is more than one way to do this. This is the way when using a strainer, a metal sheet for shape and strength. The other would be with just leather built up and then later cutting the stirrup slot. We will try that way one day too. But this seemed simpler for a beginner.
We also took the skiver to the edges of the gullet piece and scraped them all down to a feather so they won't show through the top leather that goes on there on the forks.


This has actually been two trips down to see Randy at the ranch. Each session was about four hours each, so about eight hours for this.
Thanks for stopping in again.


Comments